Welcome to the Paper Pumpkin Pop Up Blog Hop! We are all fans of this monthly crafting kit and want to share with you our enthusiasm for this box of fun and creativity. The beauty of the Paper Pumpkin kit is that you can follow the directions provided in the kit to make the projects as they were designed, or use the supplies as a starting point and let your creativity run wild. On this hop we will be sharing lots of ideas with you on how to use this March Paper Pumpkin kit: May Good Things Grow.
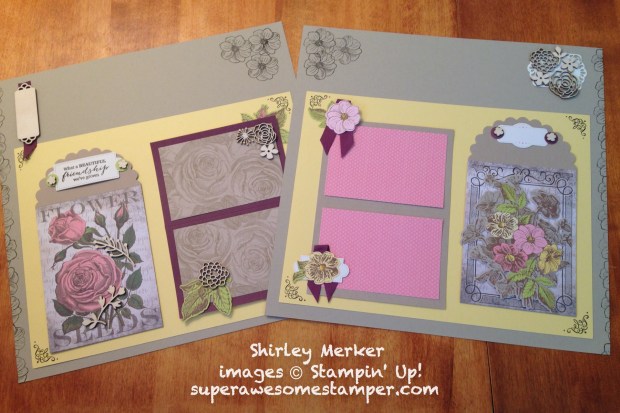
This kit created 8 cards with pocket envelopes. The pocket envelopes make great memorabilia envelopes on a scrapbook layout. The card supplies create space for photo mats. The open space at the top of the pages are for titles when photos are added.
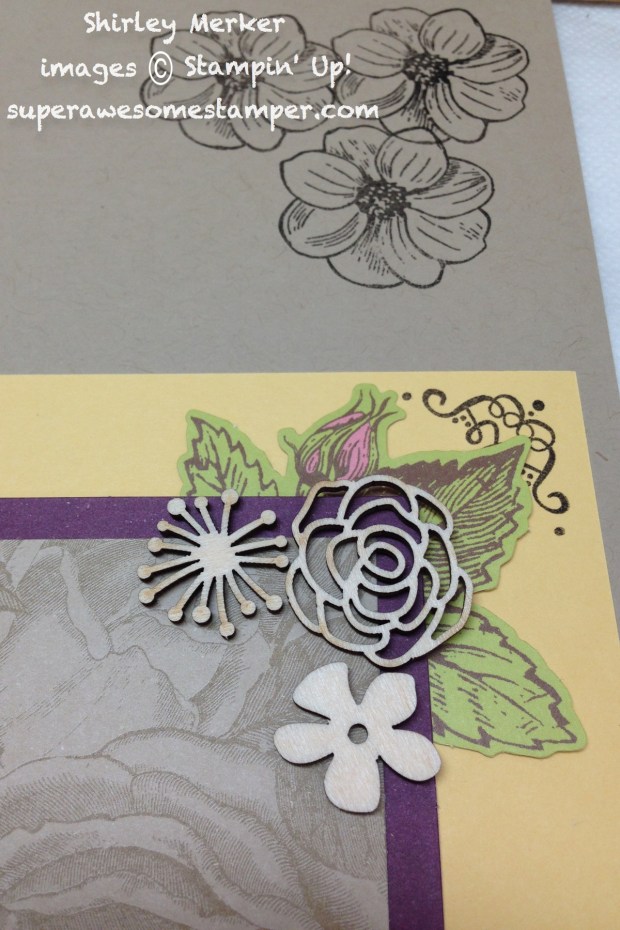
This kit contained bonus wood die cuts in celebration of Paper Pumpkin’s 5th Anniversary. Attach them with glue dots or green glue. The stamps and ink are from the kit too.
Fold over the included ribbon and tuck under the flowers.
Are you currently a Paper Pumpkin subscriber? If not, now is a great time to join in the fun. NEW subscribers receive 50% off their first 2 months with the Creativity Starts with Paper Pumpkin promotion which ends May 10th. Contact your demonstrator to get started or CLICK HERE to subscribe with me as your demonstrator. Please use promo code SAVEFIFTY0418 otherwise you won’t receive the discount.
Thank you for joining us as we share with you the possibilities of Paper Pumpkin, now hop over to Lisa’s blog to see her fun creation.
Welcome to our Ink and Share Blog Hop featuring projects made with Stampin’ Up! products designed by fellow Stampin’ Up! Independent Demonstrators. If you are hopping around, you have arrived from Kirsten’s blog. My hop design is below.
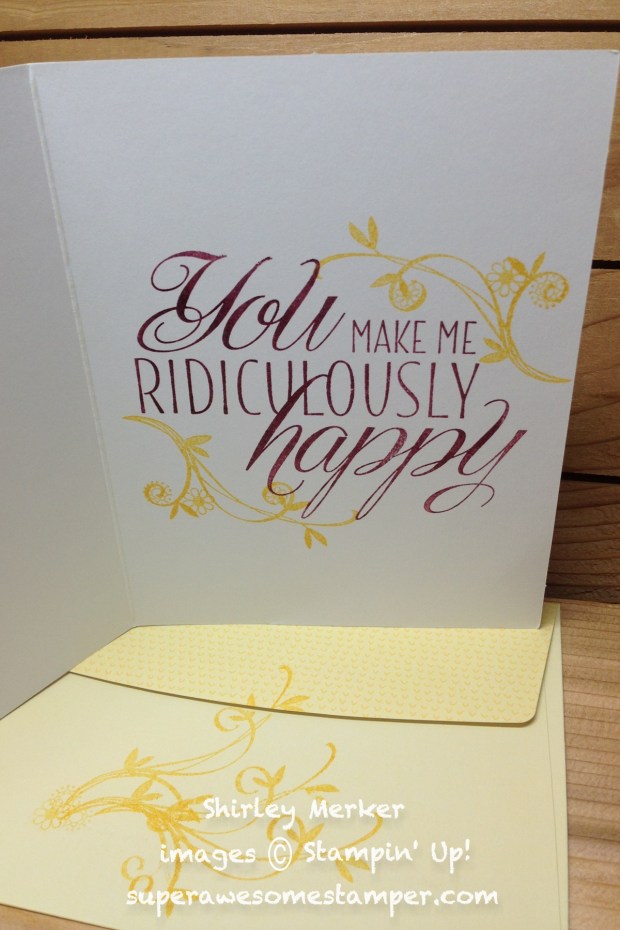
I am featuring the Hold on to Hope stamp set and framelits to create a hand stamped greeting card. The Painted with Love specialty designer series paper has gold accents so pairs well with blocks of gold foil sheets. I’ll be making several of these so they are ready for mailing as needed.
The dsp also has painted looking stripes of rich razzleberry and powder pink. So the mat is rich razzleberry attached to powder pink cardstock. Linen thread and powder pink shimmer ribbon encase the crosses.
The inside carries over the stamping on the right border with a whisper white liner to write a personal message.
Check back tomorrow for assembly tips. Thanks for hopping with us!
Now click on the Next image below to hop to Joanne’s blog and her fabulous project!
Thanks for stopping back for the how to tips on creating the Happy Birthday Blog Hop entry I shared in yesterday’s post. The scrapbook layout is on the left and the greeting card is on the right in the photos below.
First, the balloon bouquet punch was used to create lots of balloons from Picture Perfect Party designer series paper. It is already sized at 6×6 inches so punching was quick. I just had to strategically place the punch to include colors and not white space in the balloons.
I then decided to use the full 6×6 inches of the dsp on the scrapbook layout so that all the fun patterns could be enjoyed. The dsp was attached to 12×12 inch crumb cake for stability.
Rich razzleberry 8.5×11 inch cardstock was cut into 4 equal pieces to 4.25×5.5 inches. Whisper white 8.5×11 inch cardstock was cut to about 6 equal pieces for the next layer.
Fresh fig finely woven ribbon was attached using tear n tape as shown below.
Rich razzleberry classic ink was used to keep it simple and accent the dsp.
The greeting card started with 8.5×5.5 inch rich razzleberry cardstock. The next layer is lemon lime twist cut to 5 3/8 x 4 1/8 inches. Bermuda bay is next at 5×4 inches. Whisper white is about 1/6 of an 8.5×11 sheet. I decided to use all of the stamps on the card that were used in the scrapbook layout.
Quick and colorful!
If you missed the hop, click here to enjoy all the fabulous Happy Birthday projects.
There are a few more days to earn Sale-A-Bration rewards. More regular catalog products have been offered as Sale-A-Bration rewards too. Go to my online store by clicking here for details and to place your order. Make sure to use a host code if applicable!
Welcome to the Inspire, Create, Share Blog Hop featuring Stampin’ Up!’s Sale-A-Bration 2018 products. We have great projects to share with you at all our hop stops! If you are hopping around, you have just arrived from Audra Monk’s fabulous blog. My hop entry is below.
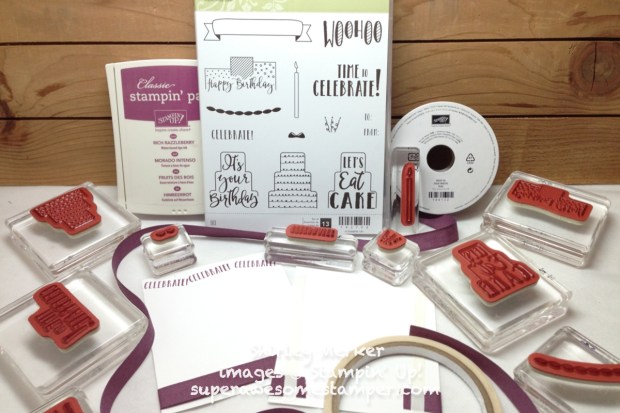
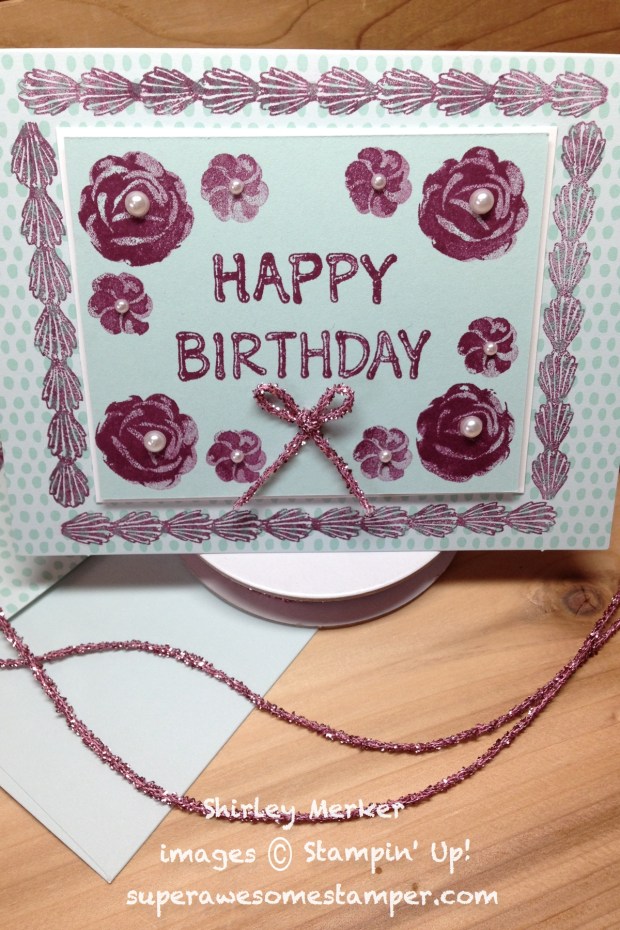
I decided to start with the Tutti Frutti Cards and Envelopes because they are stamp ready with backgrounds already printed on them. The Icing on the Cake stamp set provides quick cake decorating images. The florals are 2 step stamps that provide instant depth.
The pearl basic jewels remind me of the pearl candies sometimes added to edible cake decorations.
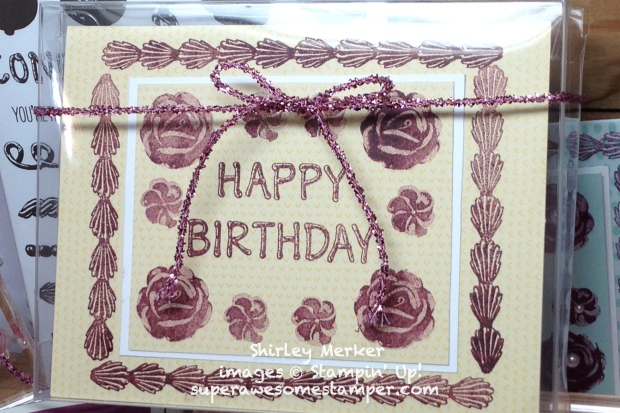
Insert a full card into our acetate card boxes to decorate the box and deliver your personal happy birthday greetings. The Love Mini Tinsel Trim adds a nice touch to the card and around the box.
Check back tomorrow for designs tips and supplies used.
Click the Next image below to hop to the next stop at Karie Bagleu’s blog!
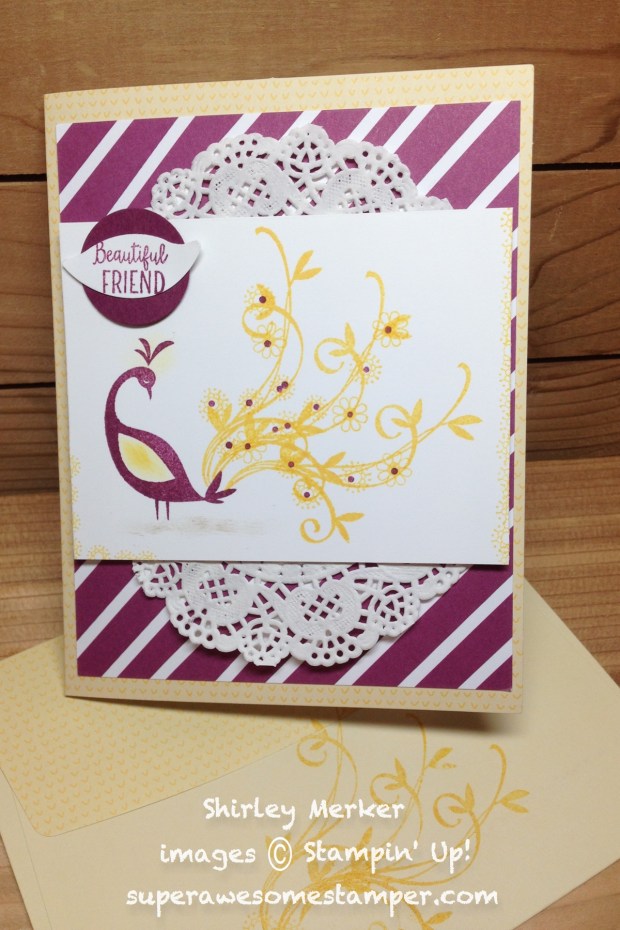
I shared this design in yesterday’s blog hop. Thanks for hopping back for the design details. I started with the Tutti Frutti cards and envelopes. Bonus is that they are already cut, scored and have tone on tone “v” design printing.
The first layer is a diagonal striped rich razzleberry print that is part of the Sweet Soiree Memories and More card pack. It was originally sized at 4×6 inches. A 1×4 inch piece was cut off so it would fit on the card front.
Next, our delicate white doilie was cut in half and adhered as shown.
Close up of the peacock stamped on a piece of 3 x 3 7/8 inch whisper white cardstock. One of the circle stamps was used to create a daffodil delight inked border along one side and then one opposite corner. The “beautiful friend” stamp was cut using the lemon builder punch layered with a 1 inch circle punched rich razzleberry cardstock piece.
Sponge daubers were used to add daffodil light ink to the wing and head feathers. Crumb cake ink daubed underneath the peacock grounds the bird.
The lemon builder punch was used to create the sentiment.
Stamp the inside of the card with a sentiment from the Lovely Friends stamp set. Decorate the envelope back with daffodil delight inked peacock feathers.
All the supplies used…
Click on the video below to watch the steps used to make the focal point peacock.
Sale-A-Bration is also an opportunity to earn $25 more in host rewards with a $250 party. Ask me for an online ordering host code that you can share with your friends. Their orders will be gathered to your party through your host code helping you reach $250 in sales and $25 more in host rewards!
Would you like to save money on your stamp purchases? Join my Super Awesome Stampers team during Sale-A-Bration and pick 2 additional stamp sets to include in your $99 starter kit. You also get to pick what other stamping goodies up to $125 are included in your starter kit. Your starter kit ships for free too! Joining my Super Awesome Stampers Team has the best benefits a stamper could wish for! Click here for full details and to join the fun!